
How To Make Fermented Giardiniera Recipe: Italian Pickled Vegetables
Fermented Giardiniera: The Ultimate Tangy Condiment for Every Dish
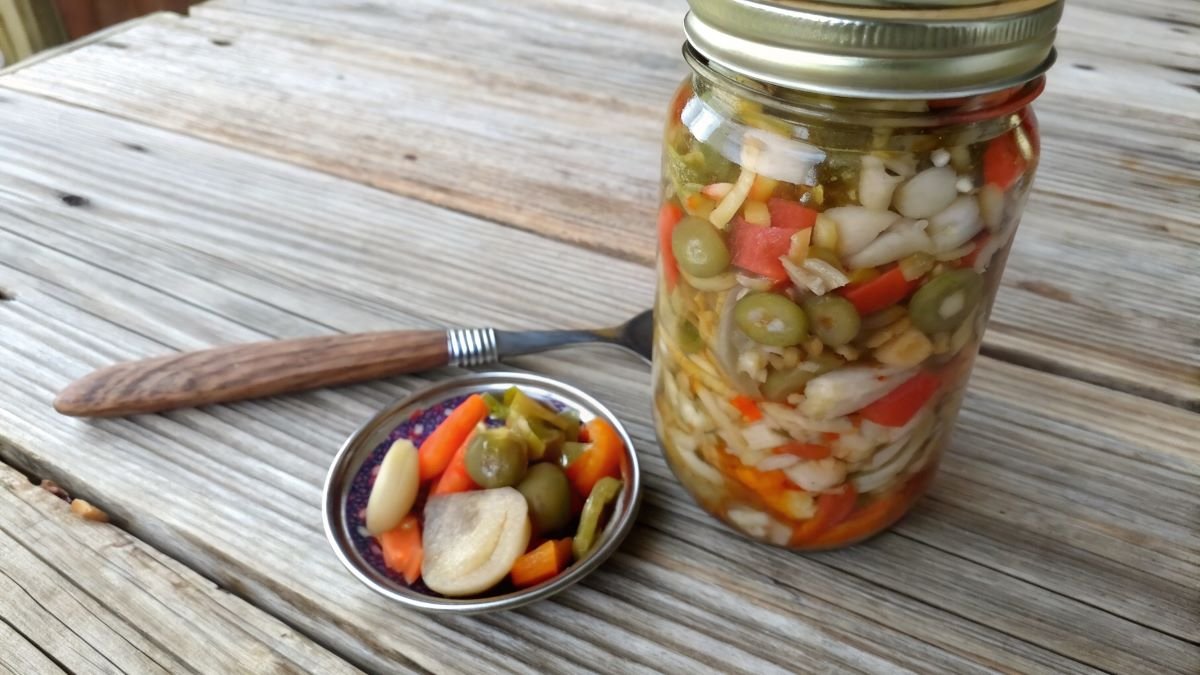
I’m excited to share how I make my fermented giardiniera. It’s basically crunchy veggies like cauliflower, carrots, and bell peppers, all with this awesome tangy kick. I’ll walk you through the steps so you can make your own batch. Trust me, this stuff can really wake up any meal.
What is Fermented Giardiniera?
Giardiniera’s origins are in Italian pickling – preserving garden vegetables (“giardino”) in vinegar. However, fermented giardiniera is a more recent development. It comes from rediscovering ancient food preservation methods, blending the Italian “sottaceti” tradition with lacto-fermentation, a practice used for thousands of years across different cultures.
It’s not a story of one person inventing it, but many things coming together. As people became more aware of the health advantages of fermented foods, especially probiotics, and with the rise of DIY food culture in the late 20th and early 21st centuries, cooks began experimenting with fermenting different vegetables, including those typically in giardiniera.

The main ingredients – bell peppers, carrots, and celery – were still common, representing the variety of garden produce. But instead of just using vinegar to keep them fresh, they were now transformed through fermentation.
This change adds richness and intricacy to the giardiniera’s taste, improving its tang with slightly sour hints. Although many cultures worldwide have fermented vegetables in their food, like kimchi in Korea or sauerkraut in Germany, fermented giardiniera stands out as a mix of Southern European flavors and health food trends, making it a modern twist.
It doesn’t carry specific cultural meaning but is a contemporary method for preserving fresh vegetables. And as chefs and home cooks embrace fermented foods for their flavor and health benefits, fermented giardiniera serves as a flavorful, probiotic-rich example of how old traditions can be renewed using an age-old method.

Now, you might see versions with added spice from chili peppers or different brines and fermentation times, showing the continuous experimentation and personal preferences of those who enjoy the tasty and healthy possibilities of fermented giardiniera.
Fermented Giardiniera Recipe
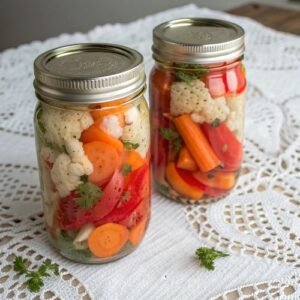
Crunchy Fermented Giardiniera
Equipment
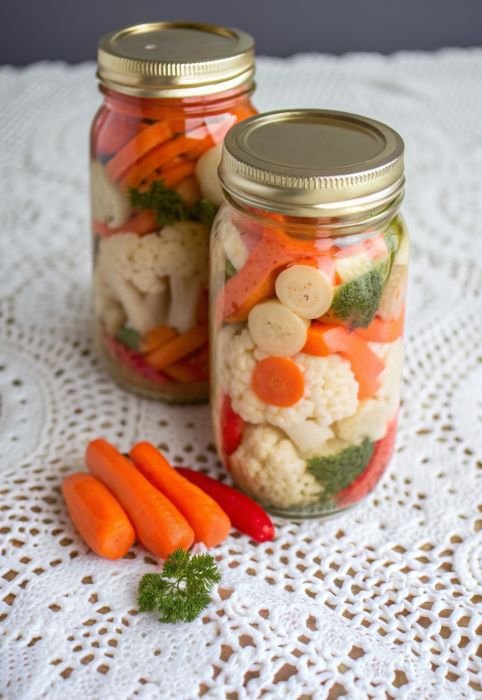
- 2 Quart-sized jars Glass mason jars (wide-mouth recommended for easy packing).
- 2 Fermentation lids Airlock lids, Fido jars with rubber gaskets, or clean breathable cloths.
- 2 Fermentation weights Two small glass jars, sterilized rocks, or sealed plastic bags filled with brine.
- 1 Large mixing bowl For massaging vegetables.
- 1 Measuring spoons For accurate salt measurement.
Ingredients
- 3 cups Cauliflower florets Bite-sized pieces (about ½ small head).
- 2 Sweet peppers Thinly sliced (use red, yellow, or orange bell peppers).
- 2 Carrots Peeled and julienned or thinly sliced.
- 2 Celery stalks Chopped into ½-inch pieces.
- 1 Medium onion Thinly sliced.
- 3 Garlic cloves Peeled and halved.
- 2 Bay leaves Fresh or dried.
- 2 Thyme sprigs Or 1 tsp dried thyme.
- 3 Hot peppers Optional (e.g., jalapeños), diced.
- 2 tbsp Non-iodized salt Pickling salt, sea salt, or kosher salt.
- 3 cups Chlorine-free water Filtered or tap water left uncovered for 24 hours to dechlorinate.
Instructions
Prep the Vegetables
- Wash all vegetables thoroughly. Pat dry.
- Cut cauliflower into florets, slice peppers, carrots, celery, and onion uniformly (¼–½ inch thick).
- In a large bowl, combine vegetables, garlic, bay leaves, thyme, and salt. Use clean hands to massage the mixture for 3–4 minutes until vegetables soften and release moisture.
Pack the Jars
- Divide the vegetable mixture evenly between the two jars, pressing down firmly with a spoon or your fingers. Ensure herbs are layered throughout.
- Pour filtered water into each jar until vegetables are fully submerged (leave 1–2 inches of headspace). Add extra brine (1 tbsp salt + 1 cup water) if needed.
- Place a fermentation weight on top to keep vegetables underwater.
Ferment
- Cover jars with fermentation lids or a cloth secured with a rubber band.
- Store in a cool, dark place (60–75°F) for 3–7 days. Check daily:Day 2–3 : Tiny bubbles will form (fermentation starts!).Skim off any white foam (harmless) or discard if mold appears (fuzzy/colored).Taste after 3 days. If tangy and crisp, it’s ready! Ferment longer for stronger flavor.
Store
- Short-term : Refrigerate and consume within 1 month.Long-term : Transfer to a cool basement/closet (50–60°F) for up to 6 months. Use sanitized jars and airtight seals.
Notes
- Salt Matters : Avoid iodized salt – it inhibits fermentation.
- Water Quality : Chlorine kills good bacteria. Use filtered or dechlorinated water.
- Stay Crunchy : Keep veggies submerged! Use a cabbage leaf under the weight if needed.
- Temperature Control : Cooler temps = slower fermentation (better crunch). Warmer = faster tang.
- Safety First : Discard if you see mold, sliminess, or smell rotten eggs.
- Serving Tip : Drain brine before serving; save it for salad dressings!
- Variations : Add radishes, green beans, or zucchini for extra color/flavor.
- Spiciness: Adjust how spicy it is by adding more or less chili flakes or using different peppers like jalapeños or serranos.
- Fridge: After fermenting, put the giardiniera in the fridge to slow it down and make it last longer. It will still ferment a little, even in the fridge.
Fermented Giardiniera Nutritional Facts Per Serving
These are the nutritional information for fermented giardiniera based on research I did online – although not much information is available. It’s not like someone took their fermented giardiniera to a food lab or anything. Anyways, keep in mind that these values vary across brands and recipes, and fermented versions may differ slightly from vinegar-pickled versions.
| Nutrient | Per 100g | Per Serving (28g) |
|---|---|---|
| Calories | 7–16 kcal | 2–3 kcal |
| Carbohydrates | 1–2g | 0–1g |
| Protein | 0g | 0g |
| Fat | 0g | 0g |
| Sodium | ~400mg | ~112mg |
Serving Suggestions
Giardiniera’s vibrant flavor profile makes it a versatile addition to a variety of culinary applications.
- Use it as a condiment to elevate commonplace meals; for example, generously spoon it onto grilled Italian sausages for a quick and gratifying lunch.
- Alternatively, use it as a topping for bruschetta, paired with creamy ricotta cheese. Its piquant notes lend themselves well to incorporation in pasta salads or as a sharp, flavorful layer in sandwiches.
- For a more “sophisticated” presentation, consider arranging the giardiniera in a refined dish alongside a charcuterie board. Its acidity provides a refreshing counterpoint to richer meats and cheeses, cleansing the palate between bites.
- Accompanying it with crusty bread and a dry, crisp white wine or Italian soda for a more.. Italian experience.
Frequently Asked Questions
Final Thoughts
You’re now ready to make your own Giardinieras.
Feel free to experiment with the vegetables. For example, substitute conventional vegetables with fennel – to impart a subtly sweet anise flavor, while cauliflower will enhance the texture with added crispness.
Plus, feel free to experiment with the seasonings. A dash of smoked paprika can contribute complexity, or a scattering of chili flakes can provide heightened piquancy.
Finally, if you are into fermenting, feel free to check our recipes section. We have hundreds of fermented recipes to try at home that will last you for months.